How to Plan a Novel Without Losing the Plot
| by Kim Montgomery | Writing
Ask ten writers how they plan a novel and you'll get eleven answers. Cards on a corkboard. Scribbles in a notebook. A spreadsheet with a tab for every character. Sticky notes on the fridge. Across the Novlr team, we've tried most of them, and they all fell apart for the same reason: our plans lived in one place, while our stories lived in another.
Every time the story changed (and lord knows the story always changes), the plan drifts a little further from the plan, So the fix, for us, is a simple plot grid, tied directly with your manuscript.
The grid method
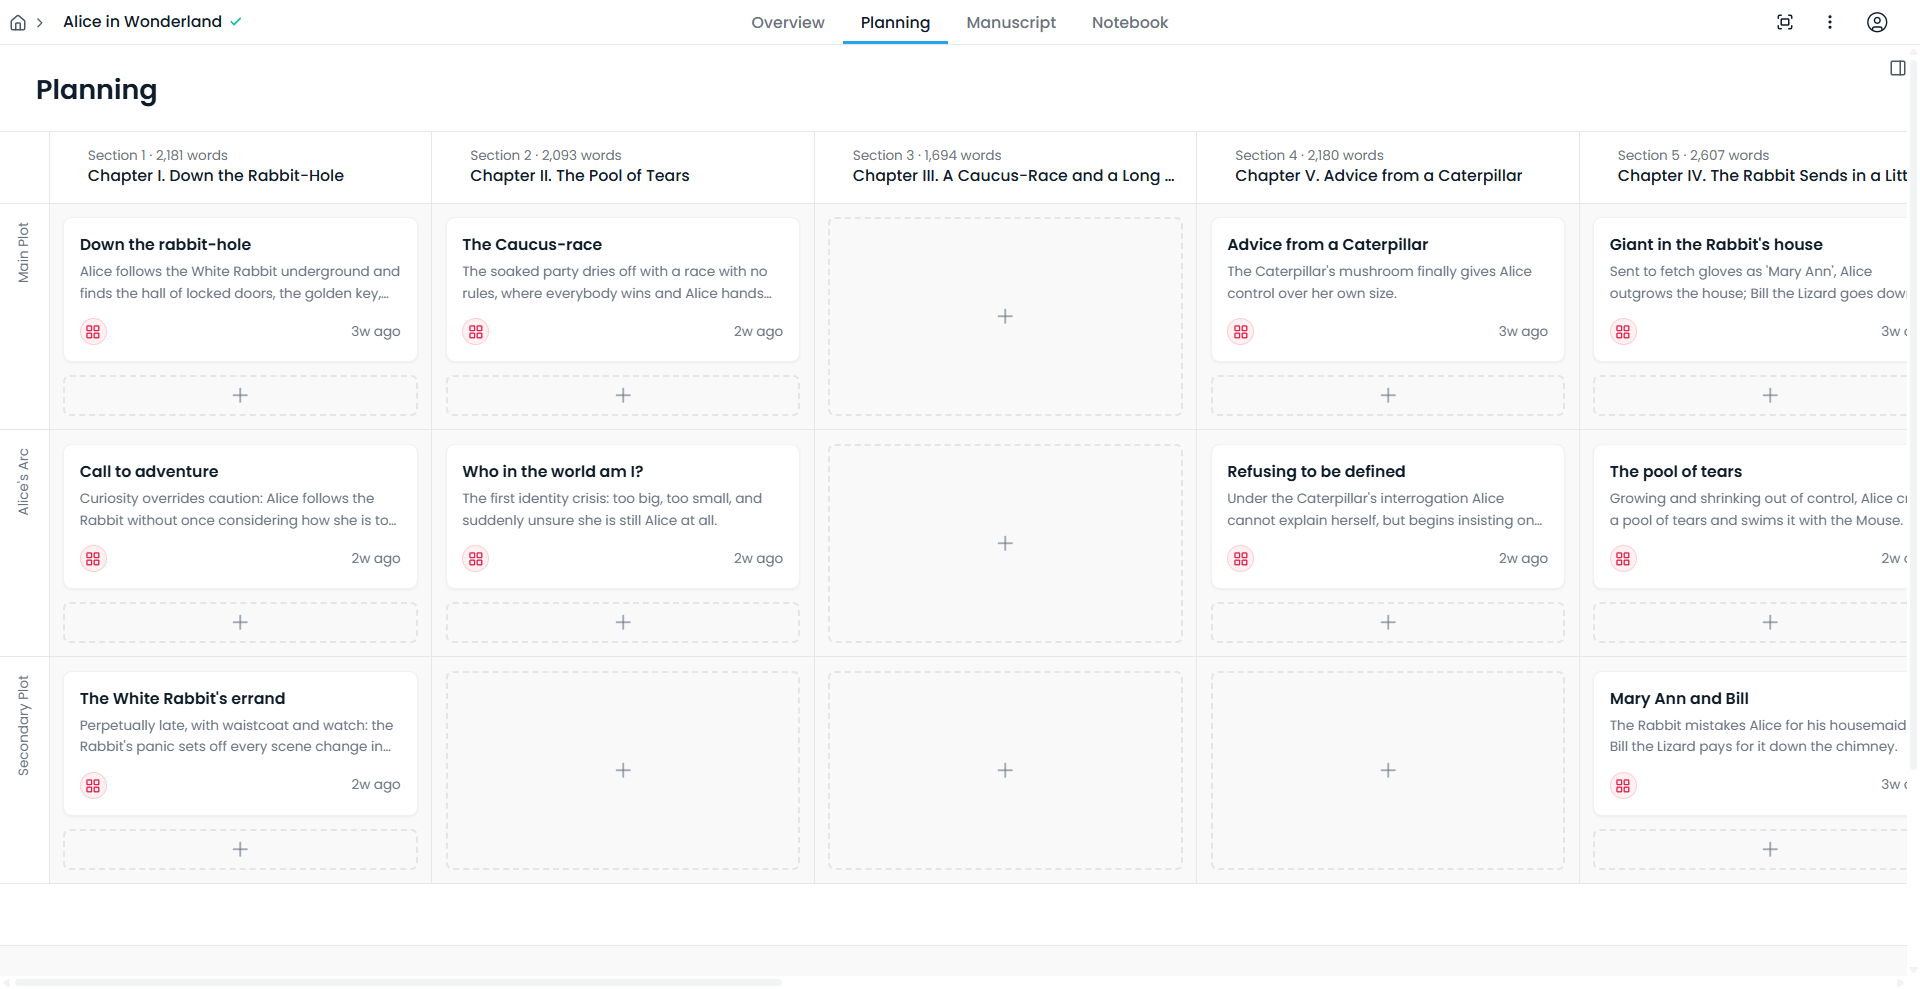
Writers have been drawing grids by hand for generations. Chapters across the top. Plot lines down the side (or vice versa), so we decided to just build this into Novlr. Every scene, beat, or reminder is a note pinned to a chapter. Read across a row and you follow a single plot thread as it travels through your chapters. Read down a column and you see every arc the chapter is carrying. Empty cells let you spot the gaps, and too many notes can show you where your pacing might need a bit more work.
From today, there's a planning tab built into every Novlr project, connected directly to your manuscript, and it's included in every plan, including Free. Here's how to use it:
Open the Planning tab
You'll find Planning in every project, sitting between Overview and Manuscript. The first time you open it, Novlr lays the grid out for you: every section and subsection of your manuscript becomes a column, with its live word count in the header, and you get two starter plot lines, Main Plot and Secondary Plot. You can add more, remove some, and rename them to whatever you want. Got ten sub-plots? Track them all here (no limits to how many plots on the free plan either).
One heads-up for longtime Novlr writers: Outline notes have been renamed Planning notes, and if you've been keeping them against your chapters, they'll already be sitting in the grid for you :) Your plan has been secretly assembled behind the scenes!

Make the rows yours
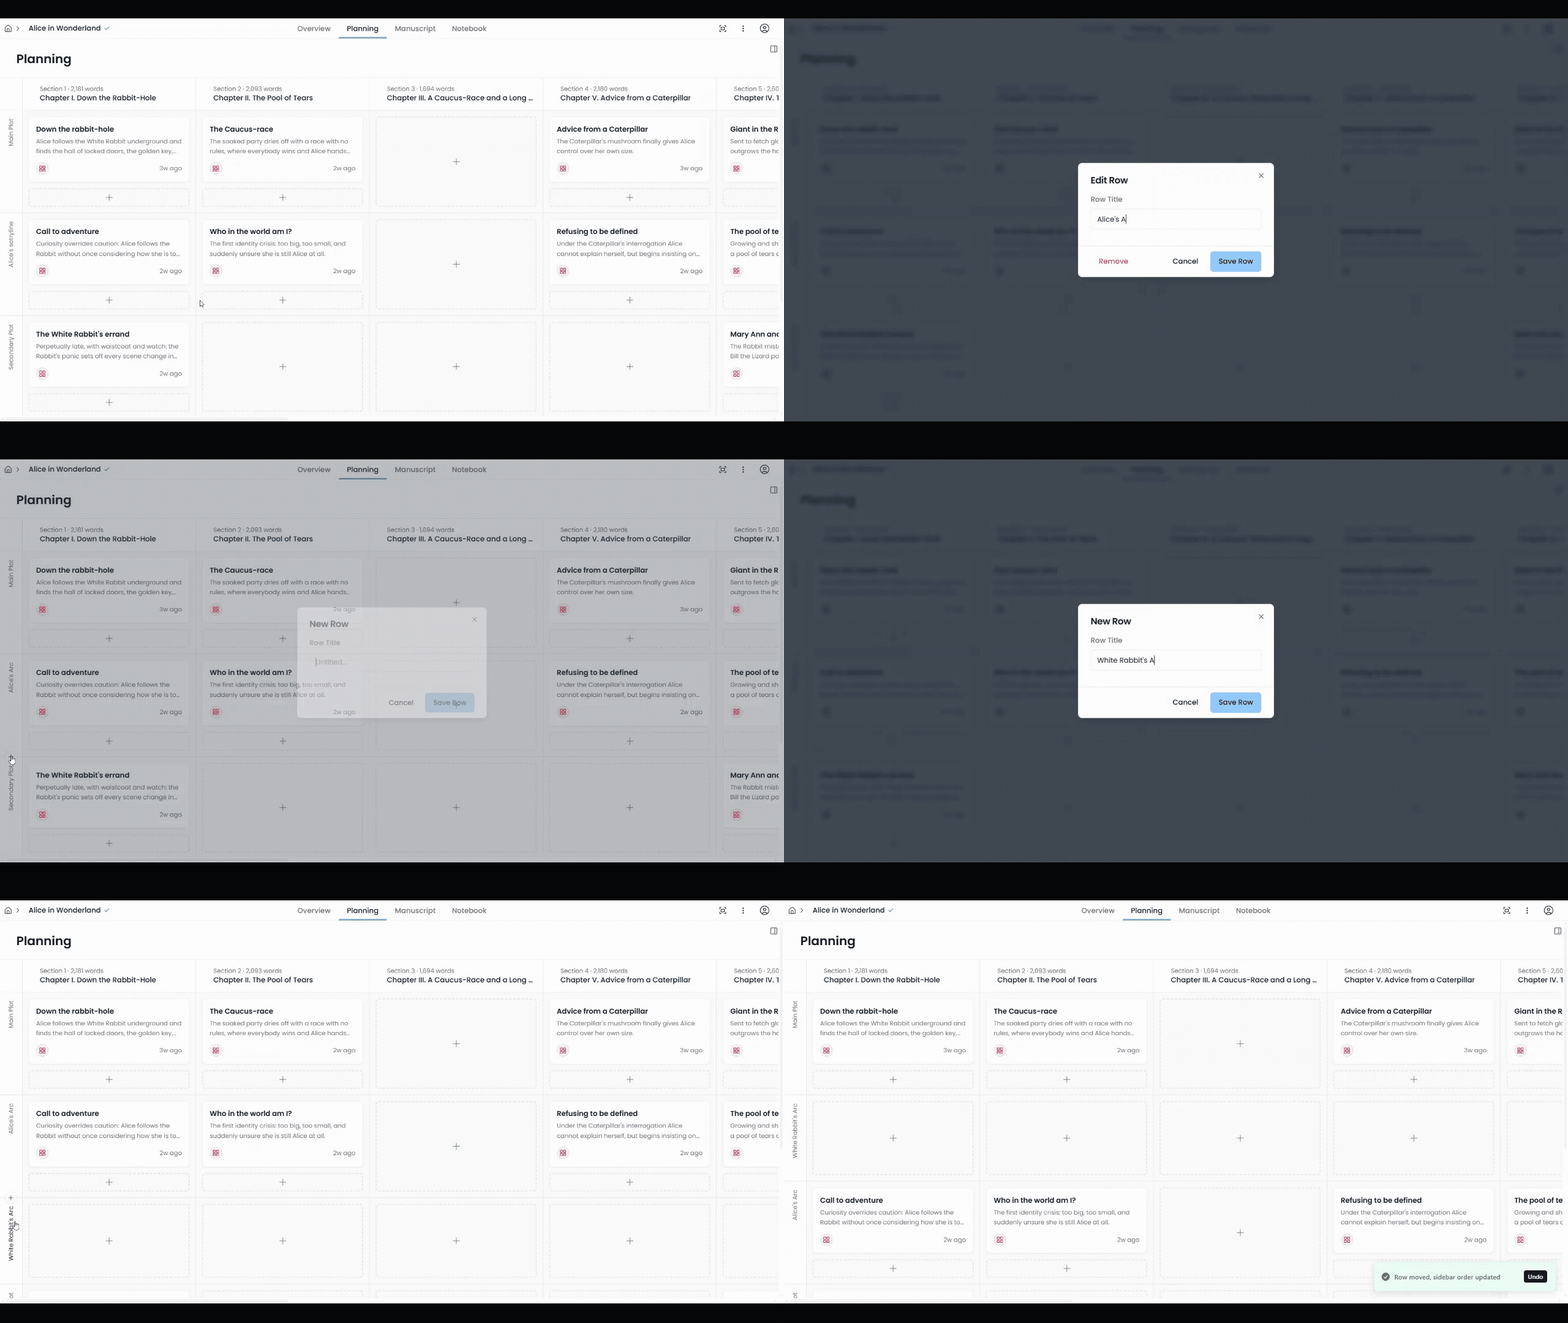
Rows are plot lines. Click a label to rename it. Hover over the row separators and a + appears to add another. Drag to reorder them.
You can also use rows as: point-of-view of a character; timelines in a dual narrative; clues in your mystery, and the red herrings hiding them; or foreshadowing I will absolutely forget about otherwise. If you need to watch a thread run through your book, then give it a row.
Fill the grid
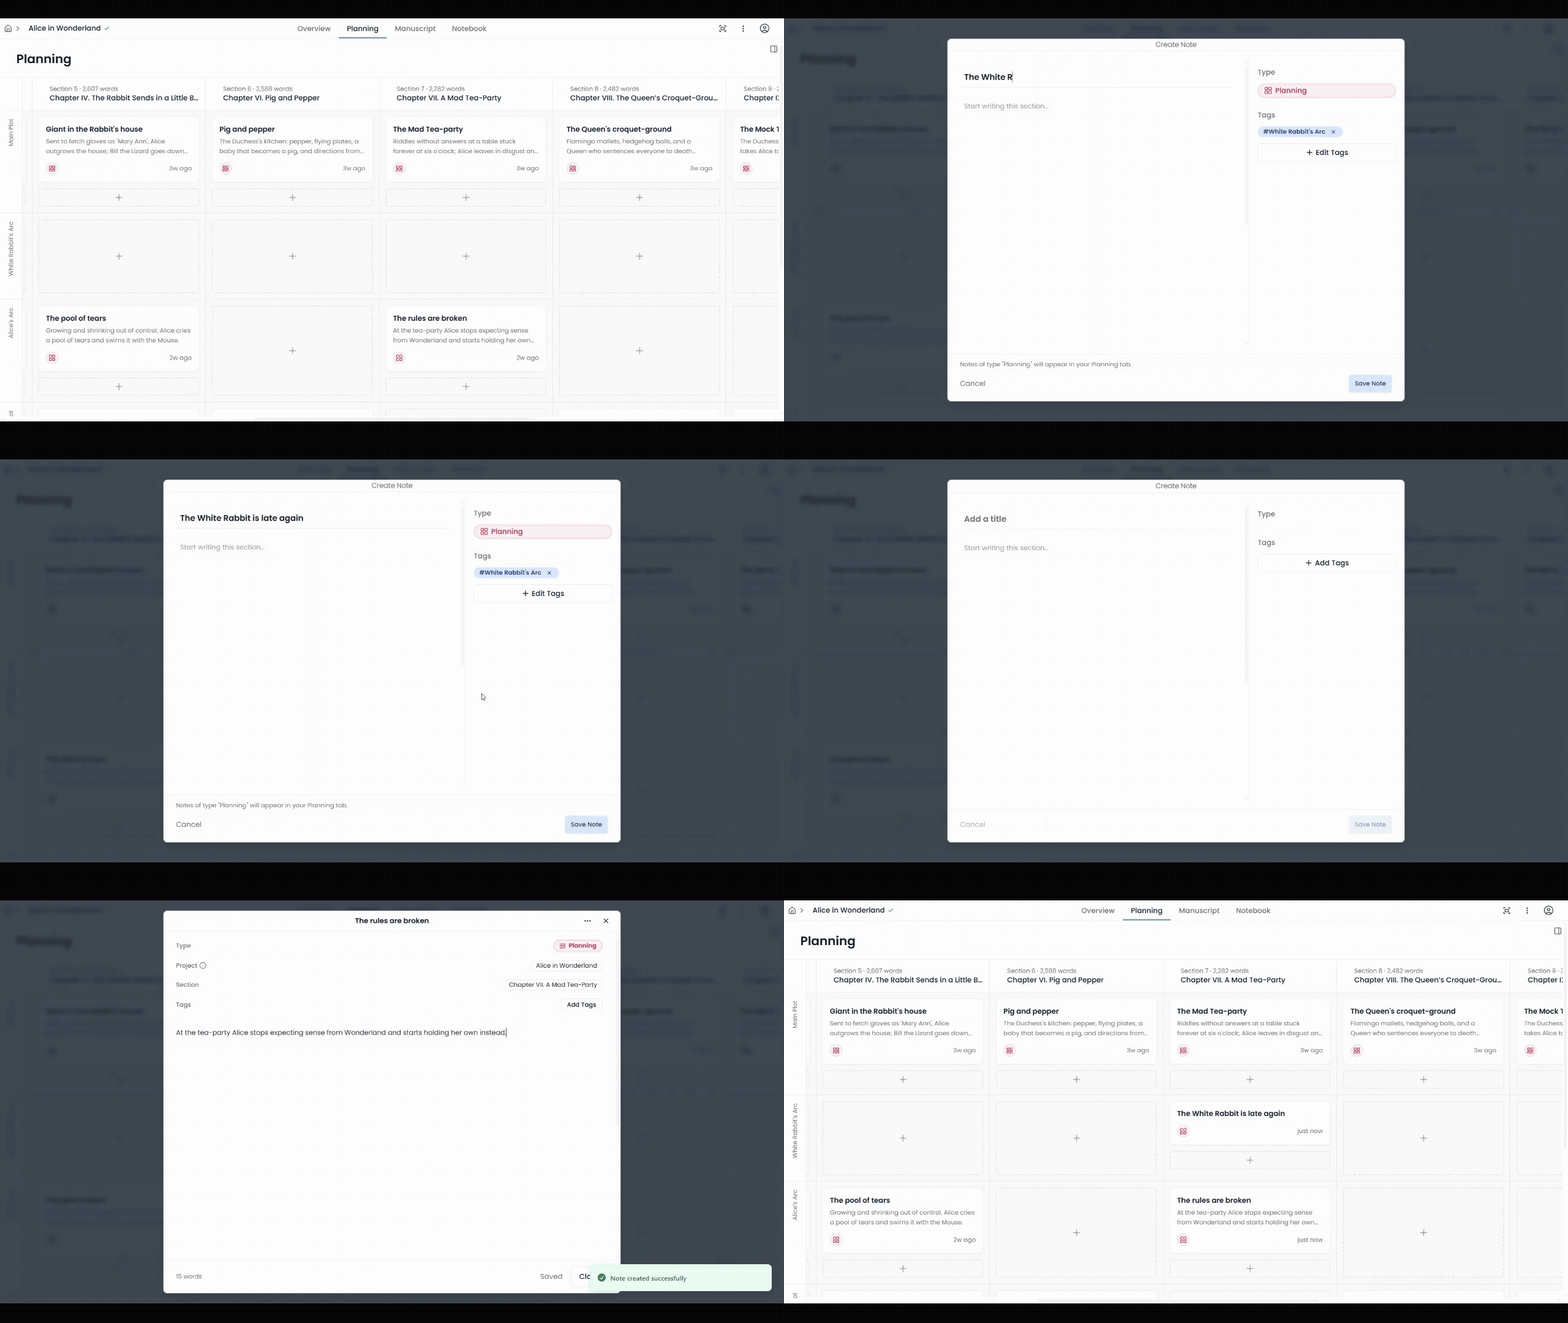
Every cell has a + button. Click it to create a Planning note, give it a title, then write as much or as little as the beat needs. It will be linked to the chapter (section) you create it in, so when you go to that section in the manuscript, you will find it in the notes sidebar waiting for you.
Planning notes are Novlr notes just like all your other notes, so you will find them in your manuscript notebook and account-wide Note Library too. Just be aware that they are filtered as hidden by default so as not to overwhelm the library view. If you can't see your planning notes immediately, just check the filters.
Clicking a card opens in the full note editor, so you can grow it into a properly worked scene plan whenever you're ready. Notes you create in the grid even take their plot line's name as a tag automatically, so elsewhere you can filter note cards into a single arc.
Drag and drop until the story flows
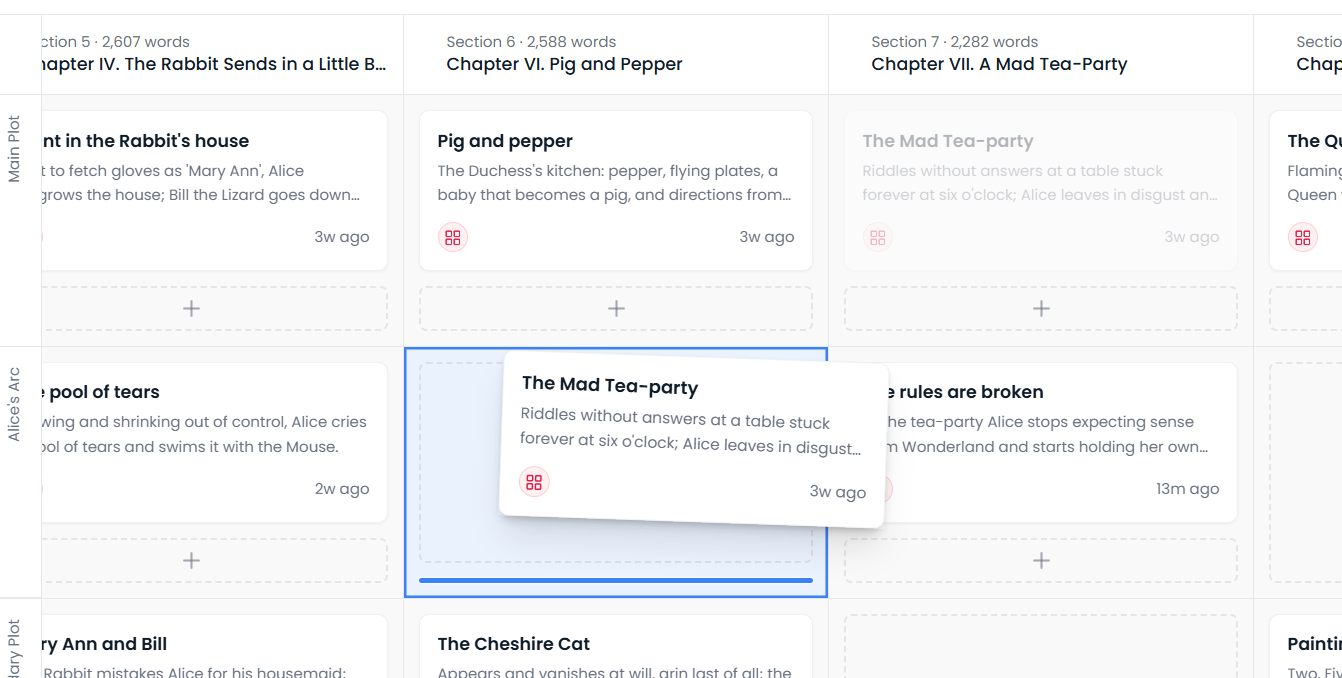
Cards are all draggable: within a cell to reorder beats, or across the grid to move a scene from chapter three to chapter nine in one motion. Any movement is always reflected back in your manuscript, because it's wired into it. It means your plan is never out of date.
A column in the planning grid read top to bottom is the exact order those notes appear in that chapter's Planning group in the manuscript sidebar, so when you rearrange the plan, the notes alongside your writing rearrange themselves to match.
Restructure your book without leaving the plan
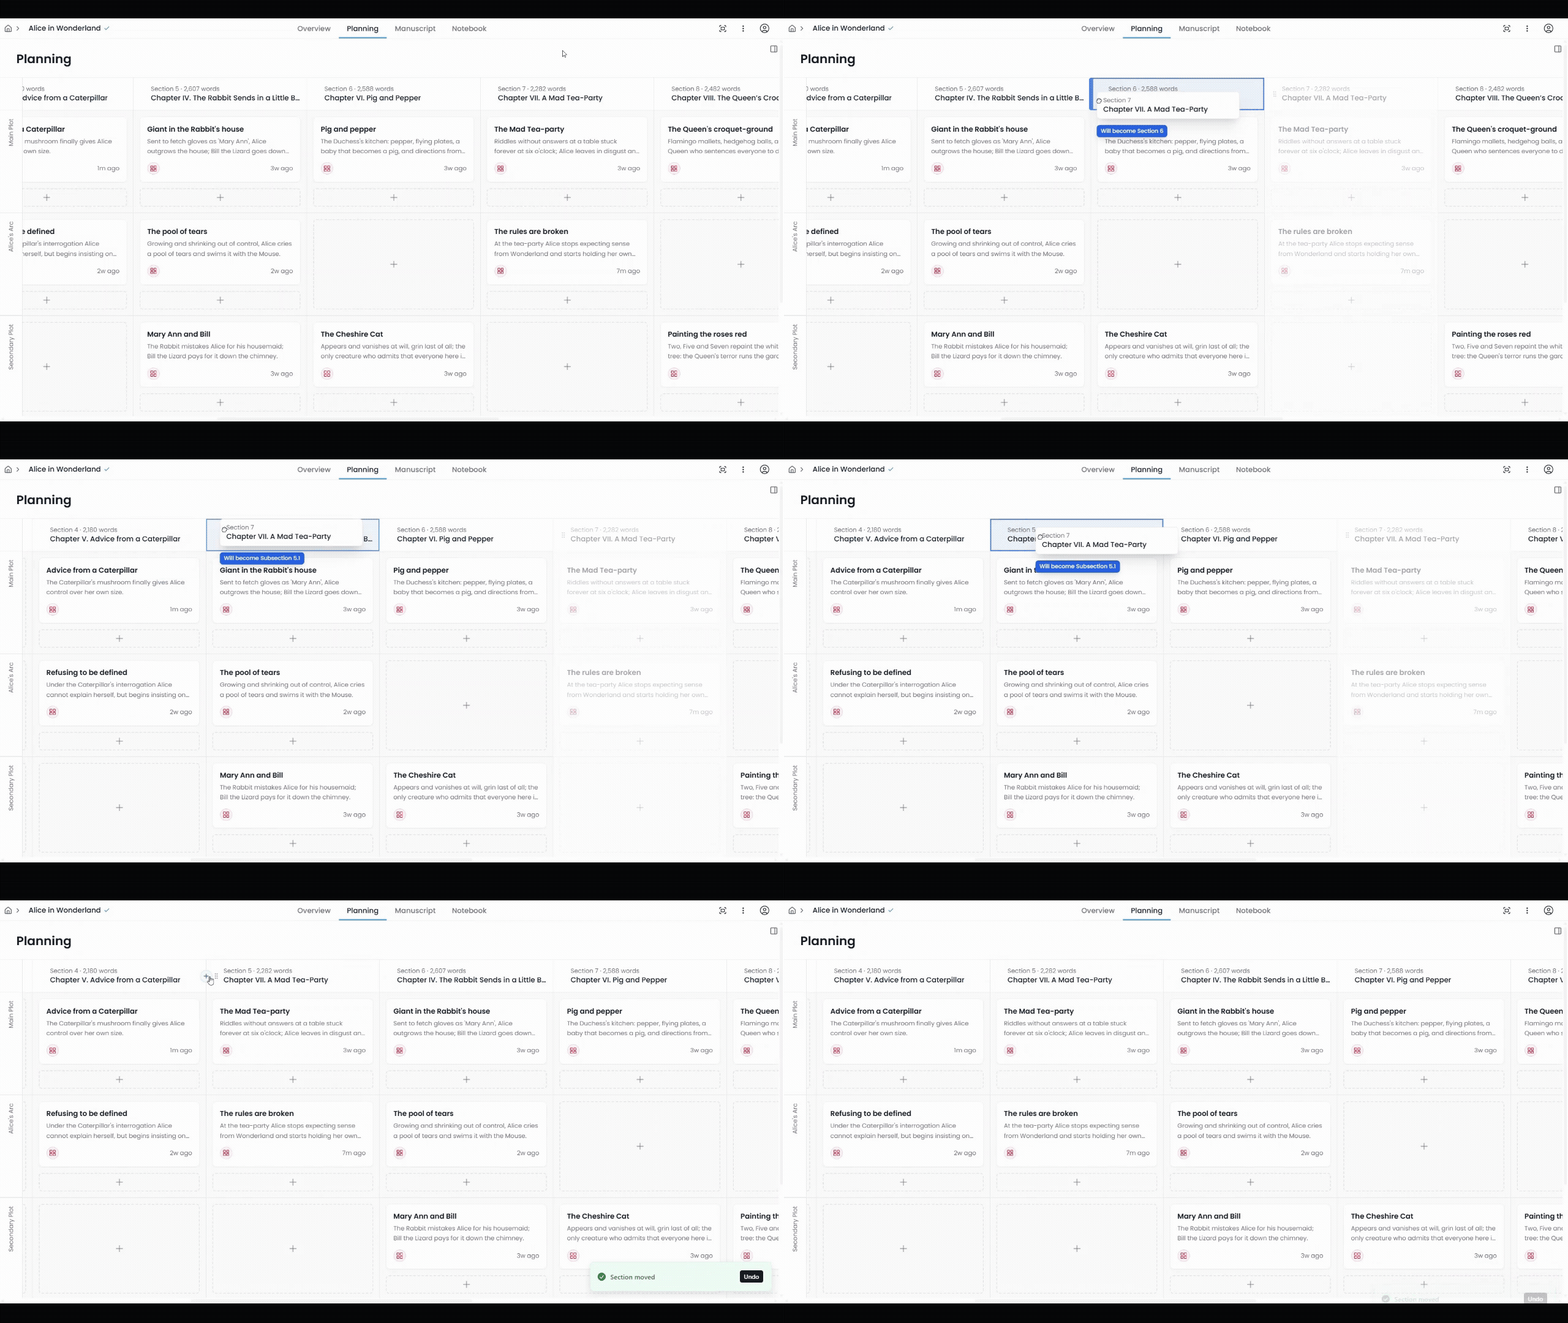
The columns in the plan are your chapters (sections) so if you hover between two column headers and a + appears, it lets you slot a brand-new section in at exactly that spot, appearing on your Manuscript page in the same instant. Click a column's title to rename it there and then. And if the shape of the whole book is wrong, grab the grip on a column header and drag: whole chapters move, subsections travel with their parent, and a live label tells you precisely what's about to happen ("Will become Subsection 2.1") before you drop. Need to make your midpoint your opening? One little drag. No copy and paste required!
A holding pen for homeless ideas
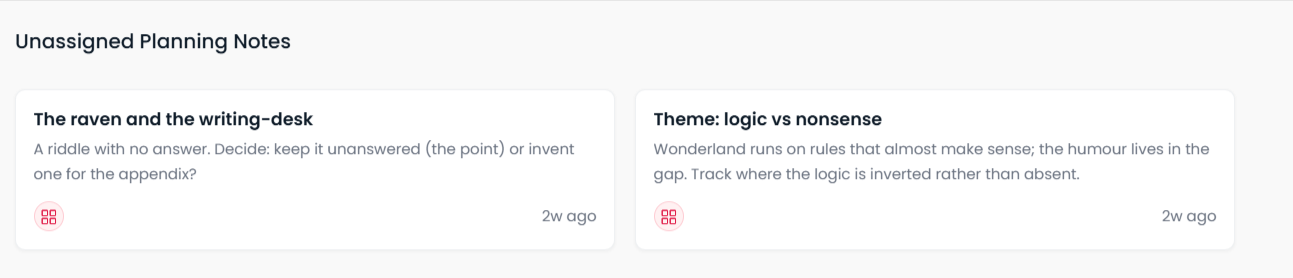
At the bottom of the grid you'll see an Unassigned tray. This is for planning notes that don't have a place yet. Every book accumulates these, and you may even end up using certain scenes in other projects. This could be anything from a scene you love but can't justify including in the final draft, or a twist that needs a build-up you haven't written yet.
Drag a card down to the tray to shelve it and drag it back up when you're ready to add it in. Notes from archived chapters also sit in here. If you ever unarchive the chapter, they slot back in to where they were.
Plan from the sofa
On a phone, the grid redesigns itself into a chapter-at-a-time view. Look through your sections, see each plot line as a collapsible group, drag cards between them, and send a card anywhere in the book with "Move to...". Tablets have the full grid with touch drag just like desktop. Also on desktop, the whole thing works with a just a keyboard and screen reader if you work that way. So plan from the bath, who am I to judge?
A workflow to kick you off
If you're staring at a blank grid on a blank project wondering where to start, here's a quickstart guide:
- Put your chapters in across the top. Rough is fine; you can add, rename, and reorder sections from the grid as the shape emerges.
- Give every thread its own row. Plots, arcs, timelines, lies your narrator tells: if it has to stay consistent, give it a row.
- Add a card where that thread needs to be dealt with in a chapter. One beat per card. Give it a title that summarises the beat then a brief plan in the content. You're not writing the whole scene yet, so just place it and write it from the scene in the section in the manuscript when you're ready.
- Read across each row: does every thread actually go somewhere? Is there a long yawning gap where a thread is lost for too long? Then read down each column: is any chapter overloaded with too many beats? Are any coasting on empty and not doing much of anything at all?
- Drag that story around! Drag it until it flows. Then go write it. The plan will be waiting in the sidebar when you get to each section, showing you exactly what you intended to include.
- Then rearrange it whenever you need.
Go and lay your story out
The Planning tab is live for everyone today, on every plan, including Free - fully featured. Open any project, click Planning, and see the whole book at a glance, possibly for the first time?
I'd love to know what some of your rows end up being called! Share screenshots of your grid and tag @novlrofficial on instagram so we can see and share them <3